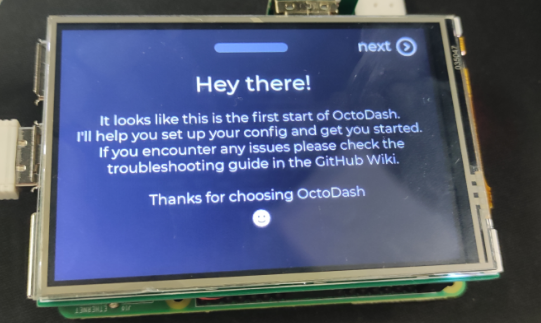
OctoDash
Step 1: Preparing MicroSD with OctoPi image
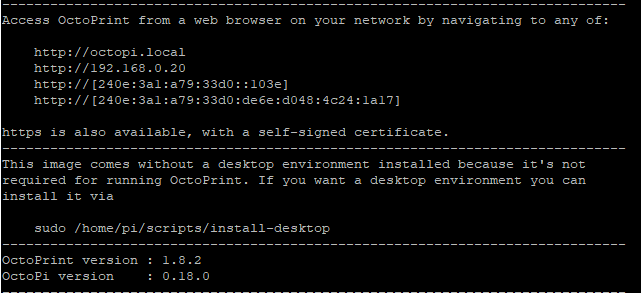
You can use Raspberry Pi Imager to load the OctoPi image or install Octopi manually. For more information, please refer to: https://octoprint.org/download/
Step 2: Accessing the OctoPi using SSH
Install your screen on the Raspberry Pi, insert the Micro SD card, and power up your pi. At this point, the LCD lights up without any graphics. Now you have to log in to Octopi on your computer via SSH, this uses PuTTY, you can use other tools as well.
Step 3: Updating Raspberry Pi OS
We need to update the Raspberry Pi OS.
sudo apt update
sudo apt upgrade
Need to reboot after the update is complete
sudo reboot
Step 4: Enable the VNC Server
If you want to make a couple of configuration changes in Raspibian, this may not be so simple, but you can access it by enabling VNC Server.
sudo raspi-config
Navigate to System Options->Boot / Auto Login->Console AutoLogin
Enable VNC Server
Then reboot
sudo reboot
Step 5: Install OctoDash
bash <(wget -qO- https://github.com/UnchartedBull/OctoDash/raw/main/scripts/install.sh)
Automatically reboots after installation, then octodash should be appeared.
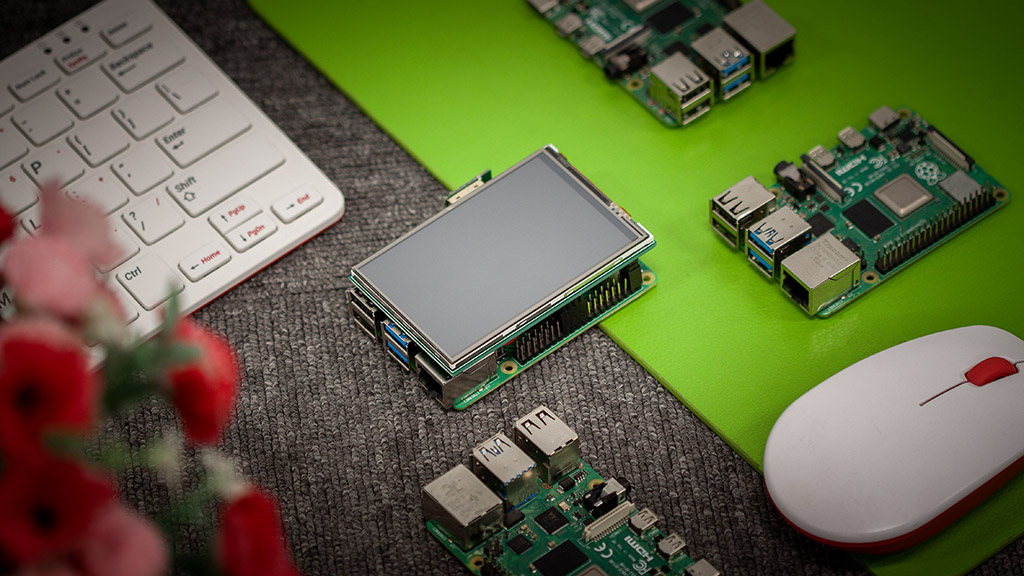
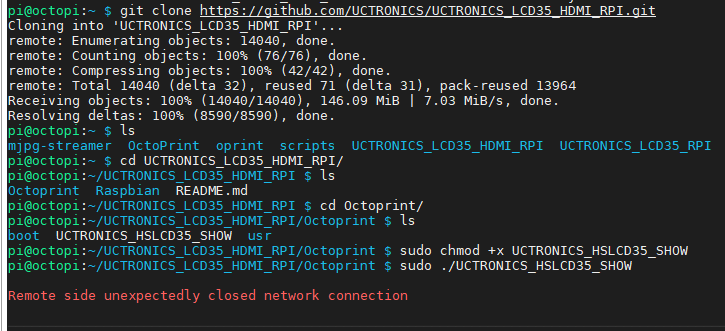
Step 6: Install the 3.5" HDMI Touchscreen Driver
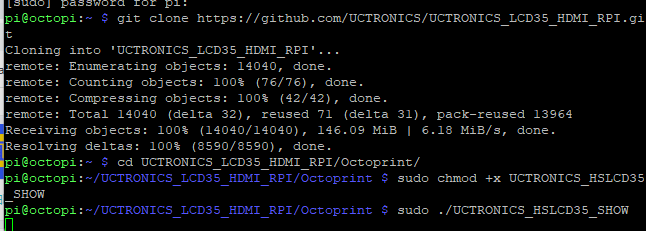
git clone https://github.com/UCTRONICS/UCTRONICS_LCD35_HDMI_RPI.git
cd UCTRONICS_LCD35_HDMI_RPI/Octoprint/
sudo chmod +x UCTRONICS_HSLCD35_SHOW
sudo ./UCTRONICS_HSLCD35_SHOW
Step 7: Final
After rebooting you will be able to use the screen touch function. Remember to connect the Raspberry Pi to a 3D Printer and Configure the OctoPi Web Interface. Else the “System” will not be working on OctoDash. Once you have connected, you will be able to use the touch screen to control your printer.
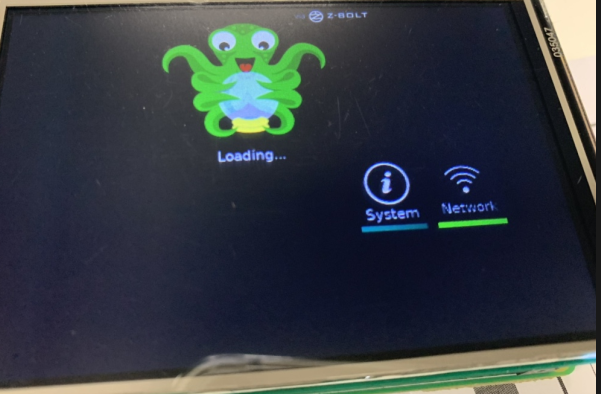
OctoScreen
Step 1: Preparing MicroSD with OctoPi image
Please refer to https://octoprint.org/download/
Step 2: The Hardware Connection
Stack the 3.5-inch TFT LCD onto the Raspberry Pi 4 Model B board, making sure the GPIO pins are aligned.
Step 3: Accessing the OctoPi using SSH
You need to log in to the OctoPi on the Raspberry Pi remotely via SSH.
Step 4: Updating Raspberry Pi OS
We need to update the Raspberry Pi OS
sudo apt update
Need to reboot after the update is complete
sudo reboot
Step 5: Install OctoScreen
sudo apt-get install libgtk-3-0 xserver-xorg xinit x11-xserver-utils
wget https://github.com/Z-Bolt/OctoScreen/releases/download/v2.7.4/octoscreen_2.7.4_armhf.deb
sudo dpkg -i octoscreen_2.7.4_armhf.deb
After reboot, octoscreen should be appeared.
Please note that due to the resolution requirements of OctoScreen, this 3.5" LCD touchscreen is not perfectly compatible with the Octoscreen graphical desktop.
Step 6: Install the 3.5" HDMI Touchscreen Driver
git clone https://github.com/UCTRONICS/UCTRONICS_LCD35_HDMI_RPI.git
cd UCTRONICS_LCD35_HDMI_RPI/Octoprint/
sudo chmod +x UCTRONICS_HSLCD35_SHOW
sudo ./UCTRONICS_HSLCD35_SHOW
After rebooting you will be able to use the screen touch function.
Step 7: Final
Remember to connect the Raspberry Pi to a 3D Printer and Configure the OctoPi Web Interface.
Else the “System” will not be working on OctoScreen.